It’s been a loooong long day. Your boss kept endlessly plying you with things to do without so much as a thanks and you jetted out of the office as soon as you could, but then when you picked your kids up from their care program they were super crabby and not exactly the loving bundles of joy you know they can be.
After they finally go to bed (you know, after the 350 excuses and 14 times coming out of their rooms), you need some sort of relaxation. You could just pour yourself a glass of wine and plunk yourself down on the couch in front of the latest Real Housewives… but I have a better idea. How about unwinding in a nice, soothing warm bath? Let the water wash your troubles away and help ease your aching muscles release their tension. And to sweeten the deal, you can use these wonderful, aromatic bath bombs. Something about using them and breathing in the intoxicating scent gives you the feeling that you’ve stepped into a spa. Just for a short while you can feel like you’ve left the every day tedium and entered a word where you are pampered and worries just melt away.
Now you might be wondering what the heck a bath bomb is. These are little compact bundles of goodness that you throw into a bath and with much satisfaction, watch as they fizz and release any hidden scents or herbs within. They contain a mix of baking soda and epsom salts, which make for a wonderful detox bath that also has the extra relaxing properties of magnesium from the epsom salt. If you add the lavender it is just a complete and utter experience of calming.
The best part? They are incredibly easy to make. You can whip up a few in an afternoon and have a week’s worth of relaxation at your fingertips. Or give them as gifts to your friends, who will be forever grateful to you for helping them forget their stress for a while too (and who doesn’t love getting homemade gifts?). OR, use them with your kids. Crabby kids usually equal bath time fights, right? But the promise of being able to throw a bath bomb into the tub turns frowns upside down and even though you might not be the one taking a bath, happy kids = happy mom. You can even throw a small toy in the middle of these that reveal themselves mid-fizz. So what are you waiting for? Directions for these homemade lavender bath bombs are below:
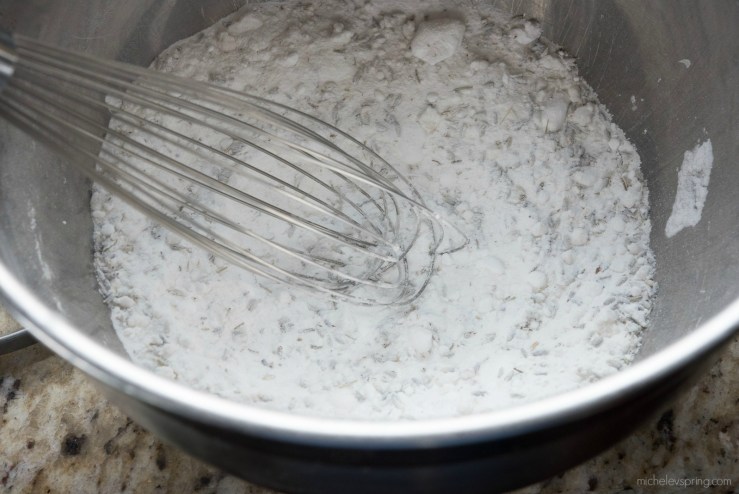
(1) Mix 1 cup baking soda, 1/2 cup arrowroot powder (or you can use corn starch), 1/2 cup citric acid, 3 tbs epsom salt, and 2 tbs dried lavender in a large bowl.
(2) Mix 3 tsp avocado oil (or other liquid vegetable oil), 1 tsp water and 10 drops Lavender essential oil in a small bowl.
(3) Mix the wet ingredients into the dry and whisk together.
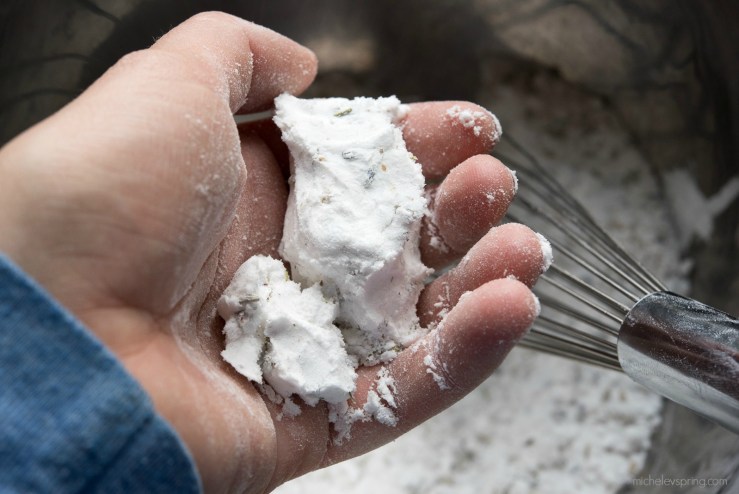
(4) Check to see if the mixture comes together when you pick it up. It should come together lightly but not be a glopy mess. If it still falls apart easily, add more water 1/8 tsp at a time until it looks like it does in the picture.
(5) If desired, add more lavender at the bottom of your molds. Then firmly pack the mixture into the molds, pressing down to compact the mixture.
(6) Let the mixture sit in the molds for at least 2 hours.
(7) Remove the bath bombs from the molds and let sit out to dry on a dish towel overnight.
To use: Simply drop one (or more) in your bath and watch as they fizz and make your bath smell divine!


These look wonderful and would m make great gifts. Please tell me where i can find the molds??
Hey Camille-
You can get it either on Amazon or I believe I’ve seen them both at Hobby Lobby and Michael’s Craft Stores if you have those in your area (in the baking/candy making aisle).
Thanks!
Thank you. I found them at Michaels. Got to us my coupon too.
I made these as Christmas gifts for all of my female family members. They were a big hit. I’m still getting calls as to how much they are enjoying them. I made so many of them and had so little time to make them that since the molds were silicone, I baked them on a low oven, 200 degrees for 20 minutes before unmolding them. Then I baked the whole tray full, without the towel, for an additional 20 minutes. It worked beautifully. Thanks for sharing. I will be making a lot more of these.
I’m so glad they were a hit! And that was genius baking them. I will have to try that since I am super impatient 🙂 Thanks for sharing!!